模块 1:Unity 编辑器 + C# 完整入门
Day 1 ⏱ 预计阅读 3.5~4 小时
从零掌握 Unity 编辑器的每个面板、C# 语言核心语法(面向 JS/TS 开发者)、MonoBehaviour 生命周期、序列化机制、Prefab 工作流、场景管理、协程系统。读完本模块,你就能独立在 Unity 中写脚本、做交互。
1.1 Unity 编辑器面板完全指南
Unity 编辑器由多个可停靠的窗口(Panel)组成。首次打开 Unity 6 (6000.x LTS),你会看到默认布局。
Scene View — 场景视图
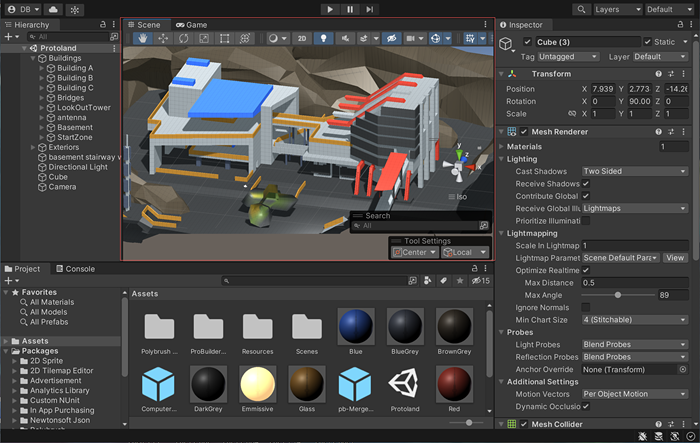
这是你可视化编辑游戏场景的地方,相当于 Cocos 的「场景编辑器」。
- 导航:鼠标右键 + WASD 可以像 FPS 游戏一样飞行浏览;滚轮缩放
- 选中物体:左键点击场景中的物体,Inspector 会显示其属性
- 移动工具:快捷键
W(移动)、E(旋转)、R(缩放) - 手形工具:
Q键,拖拽平移视图 - 聚焦选中物体:按
F键 - 透视/正交切换:点场景右上方的场景 Gizmo 切换
- 2D/3D 切换:左上角的 2D 按钮
- 显示模式:左上角下拉可选 Wireframe、Shaded、UV 等
| 快捷键 | 功能 |
|---|---|
| Q / W / E / R | 手形 / 移动 / 旋转 / 缩放 |
| F | 聚焦选中物体 |
| Ctrl+Shift+F | 将当前视角对齐到 Game View |
| Shift+拖拽 | 复制选中物体 |
| Alt+左键拖拽 | 围绕物体旋转视角 |
| Ctrl+D | 复制选中物体 |
| Delete | 删除选中物体 |
Game View — 游戏视图
预览游戏运行时的画面效果,相当于 Cocos 的「模拟器预览」。
- Play 按钮(顶部工具栏 ▶):开始/停止游戏运行(Ctrl+P 快速启动)
- Free Aspect:下拉选择不同分辨率/宽高比,模拟不同设备
- Stats:显示 FPS、Draw Call、三角面数等运行时统计
- Gizmos:控制是否显示场景中的 Gizmo 辅助图形
Hierarchy — 层级窗口
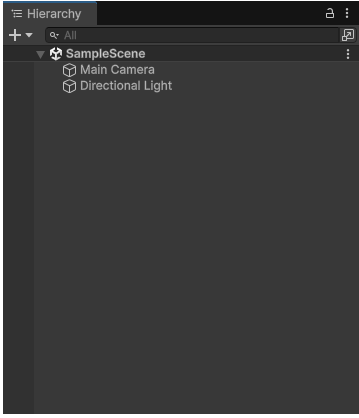
显示当前场景中所有 GameObject 的树状结构,相当于 Cocos 的「层级管理器」。
- 创建物体:右键 → 3D Object / 2D Object / UI / Light 等
- 父子关系:拖拽 A 到 B 上面,A 变成 B 的子物体
- 搜索:顶部搜索框可按名称过滤(支持
t:Light按类型搜索) - 展开/折叠:Alt+点击箭头可递归展开/折叠
- 多选:Ctrl+点击可多选,Shift+点击可范围选择
Inspector — 属性检查器
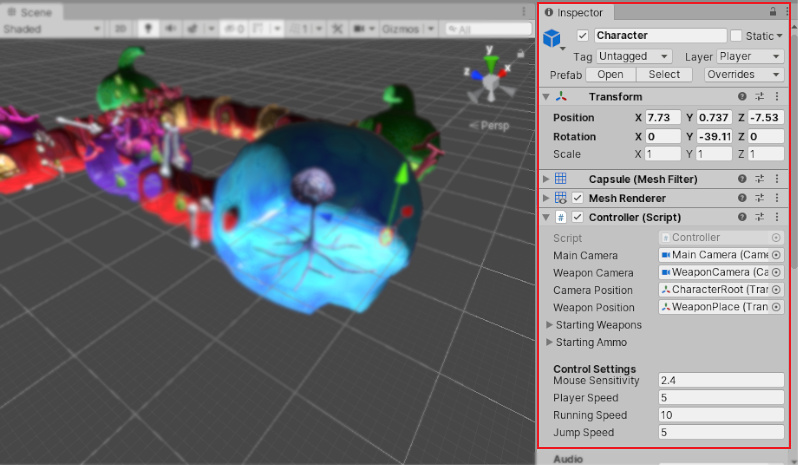
显示选中物体的所有组件及其属性,相当于 Cocos 的「属性检查器」。
- 编辑属性:直接点击数值/颜色/下拉框修改
- 拖拽赋值:把 Project 窗口的资源或 Hierarchy 的物体拖到字段上
- 添加组件:点底部 "Add Component" 按钮
- 移除组件:右上角齿轮图标 → Remove Component
- 复制/粘贴:右上角齿轮 → Copy Component / Paste Component Values
- Debug 模式:Inspector 右上角下拉 → Debug,可查看 private 字段
- 锁定:Inspector 右上角锁定图标,切换选中物体时不会改变
Project — 项目窗口
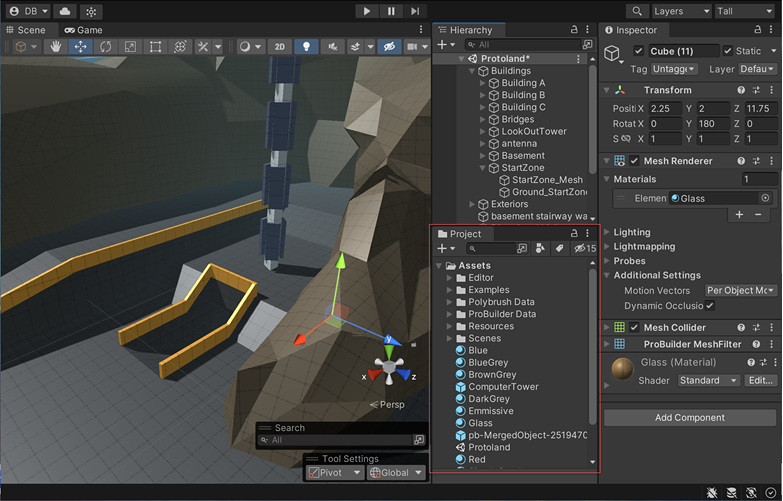
显示 Assets/ 目录下的所有资源文件,相当于 Cocos 的「资源管理器」。
- 两种视图:左上角切换为列表(One Column)或双栏(Two Column)布局
- 搜索:按名称搜索,
t:Script按类型搜索,l:MyLabel按标签搜索 - 创建资源:右键 → Create → C# Script / Material / Folder / Animator 等
- 导入资源:直接拖拽文件到 Project 窗口,或 Assets → Import Package
- Prefab 标识:蓝色图标的文件是 Prefab
Console — 控制台
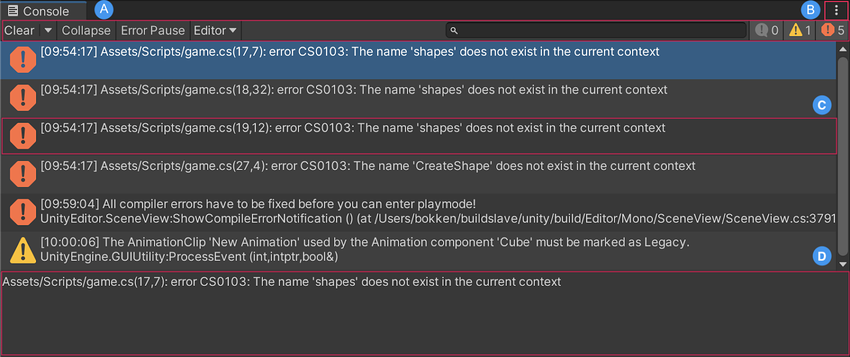
显示 Debug.Log / Debug.LogWarning / Debug.LogError 的输出。
- 三个过滤按钮:仅显示 Log / Warning / Error
- Clear:清空日志
- Collapse:合并相同日志(只显示一行+次数)
- Stack Trace:选中某条日志,下方显示调用栈
Toolbar — 工具栏
| 按钮 | 快捷键 | 功能 |
|---|---|---|
| ▶ Play | Ctrl+P | 运行/停止游戏 |
| ⏸ Pause | 暂停游戏(可检查当前状态) | |
| ⏭ Step | 单步执行下一帧 | |
| Layers 下拉 | 控制 Scene View 中显示哪些 Layer | |
| Layout 下拉 | 切换/保存编辑器窗口布局 |
在 Play Mode 下对 Inspector 属性的修改,停止后会恢复原值。如果想保留修改,右键组件 → Copy Component Values,停止后 Paste。这个坑和 Cocos 的「编辑器运行时修改不保存」一样。
1.2 C# 完整语法教程(面向 JS/TS 开发者)
你已经熟悉 JavaScript/TypeScript。C# 的核心语法和 TS 非常相似(强类型、类、泛型、接口),但有些地方更严格、更多特性。下面逐一对照讲解。
1.2.1 变量与类型
// JavaScript
let hp = 100;            // number
let name = "Player";     // string
let alive = true;        // boolean
let pos = { x: 1, y: 2 }; // object
const MAX = 999;          // 不可变引用

// TypeScript
let hp: number = 100;
let name: string = "Player";
// C#
int hp = 100; // 32位整数
float speed = 3.5f; // 32位浮点(注意 f 后缀!)
double precise = 3.14159; // 64位浮点(Unity 内少用)
string name = "Player"; // 字符串(双引号)
bool alive = true; // 布尔
char letter = 'A'; // 单个字符(单引号)
const int MAX = 999; // 编译时常量
readonly int id; // 只读(可在构造函数中赋值一次)
var pos = new Vector3(1f, 2f, 0f); // 自动推断类型- float 必须加 f 后缀:
3.5f而不是3.5,否则 C# 认为是 double - 变量必须初始化或在构造函数中赋值,否则编译报错
- null 不能赋给值类型:
int x = null;❌ 编译错误。需要可空类型:int? x = null; - 字符串插值:
$"HP: {hp}"(类似 JS 的模板字符串`HP: ${hp}`)
1.2.2 类、结构体、枚举、接口
// === 类(Class)— 引用类型 ===
public class CropData
{
    // 字段(Field)— 相当于 TS 的属性
    public string cropName;
    public int growTime = 30;
    private float _health = 100f;

    // 属性(Property)— 带 getter/setter,TS 没有原生等价物
    public float Health
    {
        get { return _health; }
        set { _health = Mathf.Clamp(value, 0f, 100f); }
    }

    // 自动属性(最常用)
    public int Level { get; set; } = 1;

    // 构造函数
    public CropData(string name)
    {
        cropName = name;
    }

    // 方法
    public void Grow()
    {
        Level++;
        Debug.Log($"{cropName} grew to level {Level}");
    }

    // 静态方法
    public static CropData CreateDefault()
    {
        return new CropData("Wheat");
    }
}

// === 结构体(struct)— 值类型,适合小型数据 ===
public struct TileCoord
{
    public int x, z;
    public TileCoord(int x, int z) { this.x = x; this.z = z; }
}

// === 枚举(enum)— 命名整数常量 ===
public enum CropState
{
    Seed,       // 0
    Growing,    // 1
    Ready,      // 2
    Withered    // 3
}

// === 接口(interface)— 契约 ===
public interface IInteractable
{
    void OnInteract(GameObject player);
    string GetInteractionHint();
}

// 实现接口
public class CropPlot : MonoBehaviour, IInteractable
{
    public void OnInteract(GameObject player)
    {
        // 收获逻辑
    }
    public string GetInteractionHint() => "点击收获";
}
1.2.3 集合类型
// JavaScript 数组 → C# List
// JS: let items = ["apple", "banana"];
List<string> items = new List<string>() { "apple", "banana" };
items.Add("cherry");
items.Remove("apple");
int count = items.Count;   // .Count, 不是 .length
string first = items[0];    // 索引访问一样

// JS 对象 → C# Dictionary
// JS: let map = { "wheat": 10, "corn": 5 };
Dictionary<string, int> inventory = new Dictionary<string, int>();
inventory["wheat"] = 10;
inventory["corn"] = 5;
if (inventory.ContainsKey("wheat"))
{
    int count2 = inventory["wheat"];
}
// 遍历
foreach (KeyValuePair<string, int> pair in inventory)
{
    Debug.Log($"{pair.Key}: {pair.Value}");
}

// 数组(固定长度)
int[] numbers = new int[5]; // 长度 5 的数组
numbers[0] = 42;

// Queue 和 Stack
Queue<string> taskQueue = new Queue<string>();
taskQueue.Enqueue("harvest");
taskQueue.Enqueue("plant");
string next = taskQueue.Dequeue(); // "harvest"(先进先出)

Stack<string> history = new Stack<string>();
history.Push("action1");
string last = history.Pop(); // "action1"(后进先出)
1.2.4 委托、事件与 Lambda
// 委托(Delegate)= 类型安全的函数引用,类似 JS 的回调函数
public delegate void OnCropHarvested(string cropName, int amount);

// 事件(Event)= 受保护的委托,外部只能 += 和 -=
public class FarmEvents
{
    public event OnCropHarvested CropHarvested;

    public void TriggerHarvest(string name, int amount)
    {
        CropHarvested?.Invoke(name, amount); // ? 检查 null
    }
}

// 使用事件
FarmEvents farmEvents = new FarmEvents();
farmEvents.CropHarvested += (name, amount) => {
    Debug.Log($"收获了 {amount} 个 {name}");
};
farmEvents.CropHarvested += OnHarvestUI; // 也可以绑定方法

void OnHarvestUI(string name, int amount)
{
    // 更新 UI
}

// 取消绑定
farmEvents.CropHarvested -= OnHarvestUI;

// ===== 推荐简写:Action 和 Func =====
// Action 无返回值的委托
Action<string, int> onHarvest = (name, amt) => Debug.Log(name);

// Func 有返回值的委托
Func<int, int, int> add = (a, b) => a + b;
int result = add(3, 5); // 8
1.2.5 泛型(Generics)
// TypeScript: function identity<T>(arg: T): T { return arg; }
// C# 几乎一样:
public T Identity<T>(T arg) { return arg; }

// 泛型类
public class ObjectPool<T> where T : Component
{
    private Queue<T> pool = new Queue<T>();
    private T prefab;

    public ObjectPool(T prefab, int initialSize)
    {
        this.prefab = prefab;
        for (int i = 0; i < initialSize; i++)
        {
            T obj = Object.Instantiate(prefab);
            obj.gameObject.SetActive(false);
            pool.Enqueue(obj);
        }
    }

    public T Get()
    {
        T obj = pool.Dequeue();
        obj.gameObject.SetActive(true);
        return obj;
    }

    public void Return(T obj)
    {
        obj.gameObject.SetActive(false);
        pool.Enqueue(obj);
    }
}
// 使用:var pool = new ObjectPool<CropRenderer>(prefab, 10);
1.2.6 LINQ 常用操作
using System.Linq; // 必须导入

List<CropData> crops = GetAllCrops();

// 过滤(类似 JS .filter)
var ready = crops.Where(c => c.State == CropState.Ready).ToList();

// 映射(类似 JS .map)
var names = crops.Select(c => c.cropName).ToList();

// 排序(类似 JS .sort)
var sorted = crops.OrderBy(c => c.Level).ToList();

// 查找第一个(类似 JS .find)
CropData wheat = crops.FirstOrDefault(c => c.cropName == "Wheat");

// 判断(类似 JS .some / .every)
bool anyReady = crops.Any(c => c.State == CropState.Ready);
bool allReady = crops.All(c => c.State == CropState.Ready);

// 计数(类似 JS .length)
int readyCount = crops.Count(c => c.State == CropState.Ready);

// 求和
int totalGold = crops.Sum(c => c.sellPrice);

// 链式调用
var result = crops
    .Where(c => c.Level >= 3)
    .OrderByDescending(c => c.sellPrice)
    .Take(5)
    .Select(c => c.cropName)
    .ToList();
1.2.7 async/await(C# 异步)
// C# 的 async/await 和 JS/TS 几乎一样
using System.Threading.Tasks;

async Task<string> FetchPlayerName()
{
    // 模拟异步操作
    await Task.Delay(1000); // 等 1 秒
    return "Farmer Joe";
}

// 调用
async void Start()
{
    string name = await FetchPlayerName();
    Debug.Log($"Hello, {name}!");
}

// ⚠️ 注意:Unity 中 async/await 不能替代协程处理每帧更新
// async 适合网络请求、文件 IO 等一次性异步操作
// 帧循环逻辑仍然用 Coroutine 或 Update
1.2.8 异常处理
// 和 JS 的 try/catch/finally 一样
try
{
    string json = File.ReadAllText("save.json");
    SaveData data = JsonUtility.FromJson<SaveData>(json);
}
catch (FileNotFoundException ex)
{
    Debug.LogWarning($"存档不存在: {ex.Message}");
}
catch (Exception ex)
{
    Debug.LogError($"加载失败: {ex.Message}");
}
finally
{
    // 无论是否异常都执行
}
1.2.9 其他实用语法
// null 条件运算符 ?.
Transform t = gameObject?.transform;  // 如果 gameObject 为 null,结果为 null 而不是报错
string n = player?.name ?? "Unknown"; // null 合并运算符 ??

// 模式匹配
if (GetComponent() is CropPlot crop)
{
    Debug.Log($"Found crop plot: {crop.cropName}");
}

// switch 表达式(C# 8+)
string icon = state switch
{
    CropState.Seed    => "🌱",
    CropState.Growing => "🌿",
    CropState.Ready   => "🌾",
    _                  => "❓"
};

// using 语句(自动释放资源)
using (var reader = new StreamReader("file.txt"))
{
    string content = reader.ReadToEnd();
} // 自动调用 reader.Dispose()

// string 常用操作
string s = "Hello World";
s.ToLower();                        // "hello world"
s.Split(' ');                      // ["Hello", "World"]
s.Contains("World");               // true
s.Replace("World", "Unity");       // "Hello Unity"
string.Join(", ", new[] { "a", "b" }); // "a, b"
1.3 MonoBehaviour 完整生命周期
MonoBehaviour 是 Unity 中所有游戏脚本的基类。理解它的生命周期回调是写出正确代码的关键。
回调方法完整列表
| 回调 | 触发时机 | 次数 | 典型用途 |
|---|---|---|---|
Awake() | 脚本实例被加载时 | 1 次 | 初始化自身引用、单例注册 |
OnEnable() | 对象变为激活/enabled | 多次 | 注册事件监听 |
Start() | 第一次 Update 前 | 1 次 | 初始化依赖其他脚本的逻辑 |
FixedUpdate() | 固定时间步长(默认 0.02s) | 多次/帧 | 物理计算、Rigidbody 操作 |
Update() | 每帧 | 1 次/帧 | 游戏逻辑、输入检测 |
LateUpdate() | 所有 Update 之后 | 1 次/帧 | 跟随相机、最终调整 |
OnGUI() | 每帧(Legacy UI) | 多次/帧 | 调试用 GUI(不用于正式 UI) |
OnDisable() | 对象变为非激活/disabled | 多次 | 取消事件监听、清理 |
OnDestroy() | 对象被销毁时 | 1 次 | 最终清理 |
物理回调
| 回调 | 触发条件 | 用途 |
|---|---|---|
OnCollisionEnter(Collision) | 刚体碰撞开始 | 伤害判定、弹跳 |
OnCollisionStay(Collision) | 持续碰撞中 | 持续伤害 |
OnCollisionExit(Collision) | 碰撞结束 | 离开检测区域 |
OnTriggerEnter(Collider) | 进入触发器 | 拾取物品、进入区域 |
OnTriggerStay(Collider) | 在触发器内 | 持续检测 |
OnTriggerExit(Collider) | 离开触发器 | 离开区域 |
执行顺序实例
// 假设场景有两个物体,各挂一个脚本
// 脚本 A(执行顺序设置为更早)
public class ScriptA : MonoBehaviour
{
    void Awake()  { Debug.Log("A Awake"); }   // 第 1
    void Start()  { Debug.Log("A Start"); }   // 第 3
    void Update() { Debug.Log("A Update"); }  // 每帧第 1
}

// 脚本 B
public class ScriptB : MonoBehaviour
{
    void Awake()  { Debug.Log("B Awake"); }   // 第 2
    void Start()  { Debug.Log("B Start"); }   // 第 4
    void Update() { Debug.Log("B Update"); }  // 每帧第 2
}

// 输出顺序:
// A Awake → B Awake → A Start → B Start →
// [每帧] A Update → B Update → A LateUpdate → B LateUpdateEdit → Project Settings → Script Execution Order,可以拖拽设置不同脚本的 Awake/Start/Update 先后顺序。一般不需要设置,只在有依赖关系时使用。
1.4 序列化与 Inspector
序列化(Serialization)决定了哪些字段会显示在 Inspector 面板中,以及保存场景/Prefab 时哪些数据会被持久化。
序列化规则
| 条件 | 是否序列化(显示在 Inspector) |
|---|---|
public int hp; | ✅ 自动序列化 |
[SerializeField] private int hp; | ✅ 用特性强制序列化 |
private int hp; | ❌ 不序列化 |
[HideInInspector] public int hp; | ❌ 虽然是 public 但被隐藏 |
public static int hp; | ❌ static 不序列化 |
[NonSerialized] public int hp; | ❌ 明确标记不序列化 |
public int[] arr; | ✅ 数组/列表可序列化 |
public Dictionary<K,V> dict; | ❌ Dictionary 不序列化 |
public MyClass obj; | ❌ 自定义类需要 [System.Serializable] |
[System.Serializable] public class MyClass | ✅ 标记后可序列化 |
| 继承 MonoBehaviour 的类 | ❌ 不能作为序列化字段 |
常用序列化特性
using UnityEngine;

// 自定义可序列化类
[System.Serializable]
public class CropConfig
{
    public string cropName;
    public int growTime = 30;
    public Sprite icon;
}

public class FarmConfig : MonoBehaviour
{
    [Header("基础设置")]           // Inspector 中的分组标题
    [Tooltip("玩家初始金币")]     // 鼠标悬停提示
    public int startGold = 100;

    [Header("作物配置")]
    [Range(1, 10)]                // 滑条控件
    public float growSpeed = 3f;

    [Min(0)]                      // 最小值限制
    public float waterCapacity = 100f;

    [Space(20)]                    // 上方留 20px 空白
    [TextArea(3, 10)]              // 多行文本框(3~10行高)
    public string description;

    [Header("引用")]
    [SerializeField] private GameObject cropPrefab;  // private 也能在 Inspector 显示
    [HideInInspector] public int debugId;           // public 但隐藏

    // 自定义类数组 — 非常常用的配置模式
    public CropConfig[] cropConfigs;
}如果配置数据需要跨 Prefab 共享、或不依赖于场景对象,用 ScriptableObject 比 MonoBehaviour 上的字段更好(模块 3 详讲)。
1.5 GameObject 与 Component API
GameObject 常用属性和方法
// 获取当前脚本所在的 GameObject
GameObject obj = gameObject;

// 基本属性
obj.name = "CropPlot";
obj.tag = "Interactable";
obj.layer = LayerMask.NameToLayer("Ground");
obj.SetActive(true);        // 激活
obj.SetActive(false);       // 隐藏/禁用
bool active = obj.activeSelf; // 当前激活状态

// 查找 GameObject
GameObject player = GameObject.Find("Player");           // 按名称(全局搜索,慎用)
GameObject[] enemies = GameObject.FindGameObjectsWithTag("Enemy");
GameObject ground = GameObject.FindGameObjectWithTag("Ground");

// 通过 Transform 查找子物体(推荐)
Transform child = transform.Find("Weapon");
int childCount = transform.childCount;
Transform firstChild = transform.GetChild(0);
Component 获取与操作
// 获取组件(最常用的方法)
Rigidbody rb = GetComponent<Rigidbody>();
Renderer renderer = GetComponent<Renderer>();

// 带 null 检查的安全获取
Rigidbody rb2 = GetComponent<Rigidbody>();
if (rb2 != null)
{
    rb2.AddForce(Vector3.up * 10f);
}
// 或用 TryGetComponent(推荐,不产生 GC)
if (TryGetComponent<Rigidbody>(out Rigidbody rb3))
{
    rb3.AddForce(Vector3.up * 10f);
}

// 在子物体中搜索(递归)
Animator anim = GetComponentInChildren<Animator>();

// 在父物体中搜索
FarmManager farm = GetComponentInParent<FarmManager>();

// 添加/移除组件
BoxCollider col = gameObject.AddComponent<BoxCollider>();
Destroy(col); // 移除组件

// 实例化
GameObject newObj = Instantiate(prefab, transform.position, Quaternion.identity);
newObj.transform.SetParent(transform); // 设为子物体

// 销毁
Destroy(gameObject);         // 帧末销毁
DestroyImmediate(gameObject); // 立即销毁(仅编辑器用)
1.6 Prefab 完整用法
创建 Prefab
- 在 Hierarchy 中配置好一个 GameObject(添加组件、设置属性、调整子物体)
- 把该 GameObject 从 Hierarchy 拖拽到 Project 窗口
- Project 窗口中出现蓝色图标的就是 Prefab
- Hierarchy 中该物体变成蓝色名字,表示它是 Prefab 实例
Prefab 变体(Variant)
Prefab Variant 继承自原始 Prefab,可以覆盖部分属性。适合「基础一样,细节不同」的场景(如不同颜色的农作物)。
- 在 Project 窗口右键原始 Prefab → Create → Prefab Variant
- 打开 Variant 编辑(双击),修改属性。修改的属性会覆盖原 Prefab,未修改的继承原 Prefab
Prefab 嵌套
Prefab 内部可以包含其他 Prefab 实例。修改内嵌 Prefab 会自动更新所有使用它的地方。
运行时 Prefab 操作
public class PrefabDemo : MonoBehaviour
{
    public GameObject cropPrefab;
    public Transform spawnPoint;

    void Start()
    {
        // 实例化到指定位置和旋转
        GameObject crop = Instantiate(
            cropPrefab,
            spawnPoint.position,
            Quaternion.Identity
        );

        // 设置父物体并保持局部位置
        crop.transform.SetParent(transform, worldPositionStays: false);

        // 访问实例上的组件
        CropRenderer cr = crop.GetComponent<CropRenderer>();
        cr.SetGrowthStage(0);
    }
}Prefab 实例上修改的属性会变成覆盖(Override),Inspector 中显示为加粗文字。右上角有 Overrides 下拉菜单,可以 Apply(应用到 Prefab 本体)或 Revert(恢复为 Prefab 原值)。
1.7 Scene 加载与切换
准备工作:注册场景
- File → Build Settings(或 Ctrl+Shift+B)
- 把需要在运行时加载的场景从 Project 窗口拖拽到 Scenes In Build 列表
- 每个场景会获得一个 Build Index 编号(从 0 开始)
同步加载
using UnityEngine.SceneManagement;

// 按名称加载
SceneManager.LoadScene("FarmScene");

// 按 Build Index 加载
SceneManager.LoadScene(1);

// 注意:同步加载会卡顿!场景越大越明显
异步加载(推荐)
using UnityEngine;
using UnityEngine.SceneManagement;
using System.Collections;

public class SceneLoader : MonoBehaviour
{
    // 显示加载进度的 UI 元素
    public UnityEngine.UI.Slider progressBar;
    public UnityEngine.UI.Text progressText;

    public void LoadScene(string sceneName)
    {
        StartCoroutine(LoadSceneRoutine(sceneName));
    }

    private IEnumerator LoadSceneRoutine(string sceneName)
    {
        AsyncOperation asyncLoad = SceneManager.LoadSceneAsync(sceneName);

        // allowSceneActivation = false 会在加载到 90% 时暂停
        // 剩余 10% 是场景激活阶段
        asyncLoad.allowSceneActivation = false;

        while (!asyncLoad.isDone)
        {
            float progress = Mathf.Clamp01(asyncLoad.progress / 0.9f);

            if (progressBar != null)
                progressBar.value = progress;
            if (progressText != null)
                progressText.text = $"{progress * 100:F0}%";

            // 加载到 90% 后,手动允许激活
            if (asyncLoad.progress >= 0.9f)
            {
                // 可以在这里做最后准备(如播放过渡动画)
                asyncLoad.allowSceneActivation = true;
            }

            yield return null; // 等待下一帧
        }
    }
}
DontDestroyOnLoad — 跨场景保留
public class GameManager : MonoBehaviour
{
    public static GameManager Instance;

    void Awake()
    {
        if (Instance == null)
        {
            Instance = this;
            DontDestroyOnLoad(gameObject); // 切场景不销毁
        }
        else
        {
            Destroy(gameObject); // 防止重复创建
        }
    }
}
1.8 Coroutine 协程完整讲解
协程(Coroutine)是 Unity 中处理「需要跨帧执行」逻辑的核心机制。类似 JS 的 async generator 或 Cocos 的 schedule/scheduleOnce。
基本语法
using System.Collections;
using UnityEngine;

public class CoroutineDemo : MonoBehaviour
{
    void Start()
    {
        // 启动协程
        StartCoroutine(MyCoroutine());
    }

    // 协程方法必须返回 IEnumerator
    private IEnumerator MyCoroutine()
    {
        Debug.Log("开始");

        // 等待 2 秒
        yield return new WaitForSeconds(2f);
        Debug.Log("2 秒后");

        // 等待到本帧渲染结束
        yield return new WaitForEndOfFrame();
        Debug.Log("渲染完成后");

        // 等待下一帧
        yield return null;
        Debug.Log("下一帧");

        // 等待 FixedUpdate
        yield return new WaitForFixedUpdate();

        // 等待条件满足
        yield return new WaitUntil(() => Input.GetKeyDown(KeyCode.Space));
        Debug.Log("按下空格了");

        // 等待另一个协程完成
        yield return StartCoroutine(AnotherCoroutine());

        Debug.Log("全部完成");
    }

    private IEnumerator AnotherCoroutine()
    {
        yield return new WaitForSeconds(1f);
        Debug.Log("子协程完成");
    }
}
停止协程
// 方式1:保存 Coroutine 引用
private Coroutine _loadingCoroutine;

void StartLoading()
{
    _loadingCoroutine = StartCoroutine(LoadingRoutine());
}

void CancelLoading()
{
    if (_loadingCoroutine != null)
        StopCoroutine(_loadingCoroutine);
}

// 方式2:按方法名停止
StopCoroutine("LoadingRoutine");

// 停止所有协程
StopAllCoroutines();
实用示例:颜色渐变
public IEnumerator FadeOut(SpriteRenderer sr, float duration)
{
    Color color = sr.color;
    float elapsed = 0f;

    while (elapsed < duration)
    {
        elapsed += Time.deltaTime;
        color.a = Mathf.Lerp(1f, 0f, elapsed / duration);
        sr.color = color;
        yield return null; // 等一帧
    }

    color.a = 0f;
    sr.color = color;
}

// 调用
StartCoroutine(FadeOut(mySprite, 2f));| 场景 | 推荐方式 |
|---|---|
| 每帧更新逻辑(渐变、动画、计时) | ✅ Coroutine |
| 等待一段时间后执行 | ✅ Coroutine(WaitForSeconds) |
| 网络请求 / 文件 IO | ✅ async/await(Task) |
| UnityWebRequest 异步 | ✅ Coroutine 或 async(Unity 2023+) |
| 需要取消/超时 | 两者都可以(Coroutine 用 StopCoroutine) |
你已经掌握了 Unity 编辑器操作、C# 语法、MonoBehaviour 生命周期、序列化、Prefab、场景加载和协程。现在可以进入 模块 2:3D 完整基础 学习 3D 开发核心知识了!