模块 2:3D 完整基础
Day 2 ⏱ 预计阅读 3 小时
掌握 Unity 3D 游戏开发的全部核心概念:Transform 空间变换、向量数学、旋转系统、相机、光照、材质、物理系统、资源管理。每个概念都有完整可复制的 C# 代码。
2.1 Transform 与父子层级
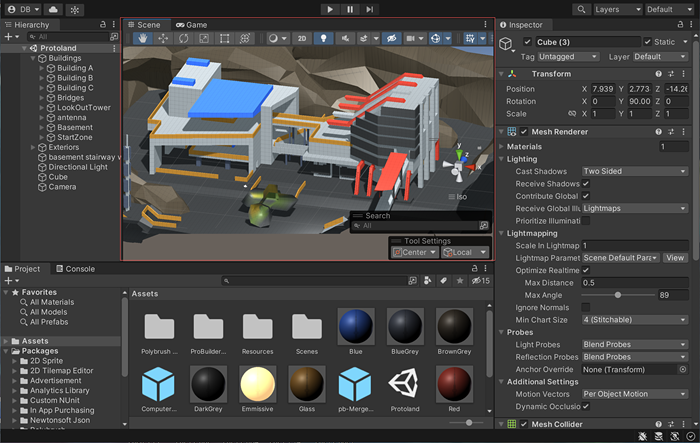
Transform 是 Unity 中最重要的组件,每个 GameObject 都有且只有一个。它存储位置(Position)、旋转(Rotation)、缩放(Scale)。
世界坐标 vs 局部坐标
// 世界坐标
transform.position = new Vector3(10f, 0f, 0f);
Vector3 worldPos = transform.position;

// 局部坐标(相对于父物体)
transform.localPosition = new Vector3(3f, 0f, 0f);
Vector3 localPos = transform.localPosition;

// 父子操作
transform.SetParent(otherTransform);            // 设为 otherTransform 的子物体
transform.SetParent(otherTransform, false);    // false = 保持局部坐标不变
transform.SetParent(null);                     // 从父物体脱离(变为根物体)

// 遍历子物体
for (int i = 0; i < transform.childCount; i++)
{
    Transform child = transform.GetChild(i);
    Debug.Log($"子物体 {i}: {child.name}");
}

// 世界 ↔ 局部坐标转换
Vector3 localPoint = transform.InverseTransformPoint(worldPoint);
Vector3 worldPoint = transform.TransformPoint(localPoint);

// 常用方向向量(相对于物体自身)
Vector3 forward = transform.forward;  // 物体前方(Z+ 方向)
Vector3 up = transform.up;            // 物体上方(Y+ 方向)
Vector3 right = transform.right;      // 物体右方(X+ 方向)

// 移动(相对于自身坐标系)
transform.Translate(Vector3.forward * 5f * Time.deltaTime); // 向前移动
农场游戏示例:构建地块网格
public class FarmGrid : MonoBehaviour
{
    public GameObject plotPrefab;
    public int rows = 5, cols = 5;
    public float spacing = 2f;

    void Start()
    {
        for (int r = 0; r < rows; r++)
        {
            for (int c = 0; c < cols; c++)
            {
                Vector3 pos = new Vector3(c * spacing, 0f, r * spacing);
                GameObject plot = Instantiate(plotPrefab, pos, Quaternion.identity, transform);
                plot.name = $"Plot_{r}_{c}";
            }
        }
    }
}
2.2 Vector3 数学运算
using UnityEngine;

// 常用静态向量
Vector3.zero       // (0, 0, 0)
Vector3.one        // (1, 1, 1)
Vector3.up         // (0, 1, 0)
Vector3.down       // (0, -1, 0)
Vector3.forward    // (0, 0, 1)  ← Unity 的前方是 Z+
Vector3.back       // (0, 0, -1)
Vector3.left       // (-1, 0, 0)
Vector3.right      // (1, 0, 0)

// 基本运算
Vector3 a = new Vector3(1, 2, 3);
Vector3 b = new Vector3(4, 5, 6);
Vector3 c = a + b;          // (5, 7, 9)
Vector3 d = b - a;          // (3, 3, 3)
Vector3 e = a * 2f;         // (2, 4, 6) 标量乘法

// 长度
float mag = a.magnitude;    // 向量长度(√(1²+2²+3²) ≈ 3.74)
float sqMag = a.sqrMagnitude; // 长度平方(更快,用于比较距离)
Vector3 n = a.normalized;    // 单位向量(长度为 1,方向不变)

// 距离
float dist = Vector3.Distance(a, b);

// 点积(Dot Product):判断方向关系
float dot = Vector3.Dot(a.normalized, b.normalized);
// dot > 0 → 同方向 | dot = 0 → 垂直 | dot < 0 → 反方向

// 叉积(Cross Product):求垂直向量/判断左右
Vector3 cross = Vector3.Cross(a, b);
// cross.y > 0 → b 在 a 的左边 | cross.y < 0 → b 在 a 的右边

// 线性插值(最常用!)
Vector3 lerp = Vector3.Lerp(startPos, endPos, t); // t ∈ [0,1]

// 移动(匀速,不会减速)
Vector3 moved = Vector3.MoveTowards(current, target, maxDistanceDelta);

// 球面插值(旋转时更平滑)
Vector3 slerp = Vector3.Slerp(from, to, t);
实用示例:向目标移动
public class MoveToTarget : MonoBehaviour
{
    public Transform target;
    public float speed = 5f;

    void Update()
    {
        // 方式1:MoveTowards(匀速到达目标)
        transform.position = Vector3.MoveTowards(
            transform.position,
            target.position,
            speed * Time.deltaTime
        );

        // 方式2:Lerp(平滑逼近,越接近越慢)
        transform.position = Vector3.Lerp(
            transform.position,
            target.position,
            speed * Time.deltaTime
        );

        // 判断是否到达
        float dist = Vector3.Distance(transform.position, target.position);
        if (dist < 0.1f)
        {
            Debug.Log("到达目标!");
        }
    }
}
2.3 旋转与四元数
欧拉角 vs 四元数
欧拉角(Euler Angles)用 (x, y, z) 三个角度表示旋转,直观但有万向节死锁(Gimbal Lock)问题:当某个轴旋转到 90° 时,会丢失一个旋转自由度。四元数(Quaternion)用 4 个数 (x, y, z, w) 表示旋转,数学上不会产生死锁,且插值更平滑。
实际使用时,你几乎不需要理解四元数的数学原理。只需要知道:用 Quaternion.Euler(x, y, z) 把欧拉角转为四元数即可。
// 欧拉角 → 四元数
transform.rotation = Quaternion.Euler(0f, 45f, 0f);

// 四元数 → 欧拉角(用于读取/调试)
Vector3 euler = transform.eulerAngles;
Debug.Log($"当前旋转: ({euler.x}, {euler.y}, {euler.z})");

// localRotation / localEulerAngles 同理
transform.localEulerAngles = new Vector3(0f, 90f, 0f);
常用旋转操作
// 朝向目标点(最常用!)
transform.LookAt(target.transform.position);
// 或指定哪个面朝前
transform.LookAt(target.transform, Vector3.up);

// 从当前位置看向目标的旋转值(不立即旋转)
Quaternion lookRot = Quaternion.LookRotation(targetPos - transform.position);

// 平滑旋转到目标朝向
transform.rotation = Quaternion.Slerp(
    transform.rotation,
    lookRot,
    5f * Time.deltaTime
);

// 绕轴旋转
transform.Rotate(Vector3.up, 90f * Time.deltaTime); // 绕 Y 轴旋转
transform.Rotate(0f, 90f * Time.deltaTime, 0f); // 同上

// 绕指定点旋转(如绕太阳公转)
transform.RotateAround(sun.position, Vector3.up, 30f * Time.deltaTime);

// 两个旋转之间的角度差
float angle = Quaternion.Angle(rotationA, rotationB);
实用示例:平滑看向鼠标点击位置
public class LookAtClick : MonoBehaviour
{
    public float rotateSpeed = 5f;

    void Update()
    {
        if (Input.GetMouseButton(0))
        {
            Ray ray = Camera.main.ScreenPointToRay(Input.mousePosition);
            if (Physics.Raycast(ray, out RaycastHit hit))
            {
                Vector3 dir = hit.point - transform.position;
                dir.y = 0f; // 只在水平面旋转
                Quaternion targetRot = Quaternion.LookRotation(dir);
                transform.rotation = Quaternion.Slerp(
                    transform.rotation, targetRot, rotateSpeed * Time.deltaTime
                );
            }
        }
    }
}
2.4 相机系统
Camera 组件关键属性
| 属性 | 说明 | 典型值 |
|---|---|---|
| Clear Flags | 渲染前清除什么 | Skybox / Solid Color / Depth Only |
| Background | 背景颜色(Solid Color 模式) | 天空蓝 #87CEEB |
| Projection | 透视/正交 | Perspective(3D)/ Orthographic(2D) |
| Field of View | 视野角度(透视模式) | 60° |
| Size | 视野大小(正交模式) | 5 |
| Near / Far | 近裁剪面 / 远裁剪面 | 0.1 / 1000 |
| Viewport Rect | 渲染区域(分屏用) | 0,0,1,1(全屏) |
跟随相机(Follow Camera)
public class FollowCamera : MonoBehaviour
{
    public Transform target;      // 跟随目标
    public Vector3 offset = new Vector3(0, 8, -6); // 相对目标的偏移
    public float smoothSpeed = 5f;

    void LateUpdate() // 一定要在 LateUpdate 中!
    {
        Vector3 desiredPos = target.position + offset;
        Vector3 smoothedPos = Vector3.Lerp(
            transform.position, desiredPos, smoothSpeed * Time.deltaTime
        );
        transform.position = smoothedPos;
        transform.LookAt(target); // 始终看向目标
    }
}
相机坐标转换
// 屏幕坐标 → 世界射线(点击检测的基础)
Ray ray = Camera.main.ScreenPointToRay(Input.mousePosition);

// 屏幕坐标 → 世界坐标(在某个深度上)
Vector3 worldPos = Camera.main.ScreenToWorldPoint(
    new Vector3(mousePos.x, mousePos.y, 10f) // z=距离相机的距离
);

// 世界坐标 → 屏幕坐标
Vector3 screenPos = Camera.main.WorldToScreenPoint(worldObject.position);

// 视口坐标 (0~1) → 世界坐标
Vector3 vpWorldPos = Camera.main.ViewportToWorldPoint(new Vector3(0.5f, 0.5f, 10f));
2.5 光照系统
光源类型
| 类型 | 说明 | 农场游戏用途 |
|---|---|---|
| Directional Light | 平行光(模拟太阳),影响所有物体 | 主光源,场景主光 |
| Point Light | 点光源(灯泡),向四面八方发光 | 房屋灯光、篝火 |
| Spot Light | 聚光灯(手电筒),锥形范围 | 探照灯效果 |
| Area Light | 面光源(仅烘焙),矩形发光面 | 柔和的室内光 |
渲染管线选择
Built-in(内置):旧管线,兼容性好,功能少。
URP(Universal Render Pipeline):移动端首选,性能好,Shader 灵活。发布抖音小游戏推荐使用 URP。
HDRP(High Definition):PC/主机端,画面最好,WebGL 不支持。
创建项目时选 "3D (URP)" 模板。如果已有 Built-in 项目,可通过 Package Manager 切换到 URP。
光照设置
// 代码中操作光源
Light light = GetComponent<Light>();
light.type = LightType.Directional;
light.color = new Color(1f, 0.95f, 0.8f); // 暖色阳光
light.intensity = 1.2f;
light.shadows = LightShadows.Soft; // 柔和阴影阴影是性能杀手。建议:只用 1 个 Directional Light 开阴影,Point/Spot Light 关阴影。Shadow Distance 设为 50(不要 150 默认值)。用 Hard Shadows 代替 Soft Shadows 节省性能。
2.6 材质与 Shader 入门
Material 基础
Material(材质)决定物体表面的颜色、质感、光照反应。它引用一个 Shader(着色器)并提供参数。
// 代码操作材质
Renderer renderer = GetComponent<Renderer>();
Material mat = renderer.material; // 获取实例(修改只影响本物体)

// 修改颜色
mat.color = Color.red;
mat.SetColor("_Color", new Color(0.2f, 0.8f, 0.3f));

// 修改浮点参数
mat.SetFloat("_Metallic", 0.5f);
mat.SetFloat("_Glossiness", 0.8f);

// 修改纹理
mat.mainTexture = myTexture;

// 修改 Tiling 和 Offset
mat.mainTextureScale = new Vector2(2f, 2f); // 纹理重复 2x2

// 共享材质(影响所有使用该材质的物体)
Material sharedMat = renderer.sharedMaterial;
最小 Shader 示例(ShaderLab 语法)
// 文件: Assets/Shaders/SimpleColor.shader
Shader "Custom/SimpleColor"
{
    Properties
    {
        _Color ("Color", Color) = (1, 0, 0, 1)
        _MainTex ("Texture", 2D) = "white" {}
    }
    SubShader
    {
        Tags { "RenderType"="Opaque" }
        LOD 200

        CGPROGRAM
        #pragma surface surf Standard fullforwardshadows
        #pragma target 3.0

        sampler2D _MainTex;
        fixed4 _Color;

        struct Input
        {
            float2 uv_MainTex;
        };

        void surf (Input IN, inout SurfaceOutputStandard o)
        {
            fixed4 c = tex2D(_MainTex, IN.uv_MainTex) * _Color;
            o.Albedo = c.rgb;
            o.Alpha = c.a;
        }
        ENDCG
    }
    FallBack "Diffuse"
}
2.7 物理系统完全指南
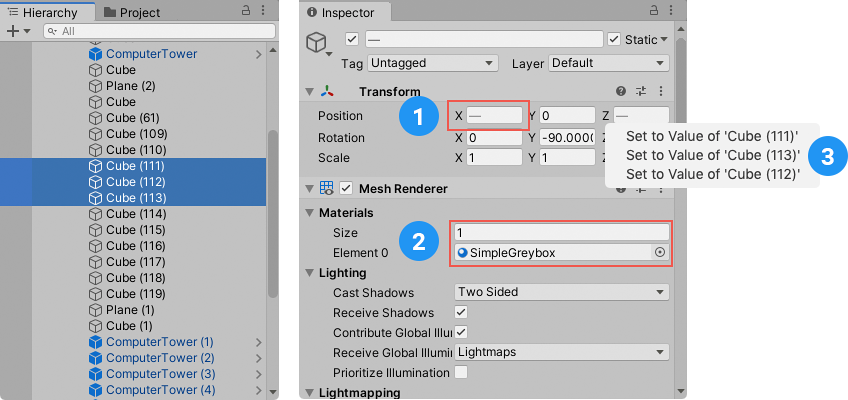
Unity 的物理引擎(PhysX)处理碰撞、重力、力的施加。
Rigidbody(刚体)
// 添加 Rigidbody 组件让物体受物理引擎控制
Rigidbody rb = GetComponent<Rigidbody>();

// 常用属性
rb.mass = 1f;              // 质量
rb.drag = 0f;              // 线性阻力
rb.angularDrag = 0.05f;   // 旋转阻力
rb.useGravity = true;     // 是否受重力
rb.isKinematic = false;   // true = 不受物理力,但可触发碰撞

// 施加力
rb.AddForce(Vector3.up * 500f);                // 瞬间力
rb.AddForce(Vector3.forward * 10f, ForceMode.VelocityChange); // 速度变化
rb.AddExplosionForce(500f, explosionPos, 5f);  // 爆炸力

// 直接设置速度
rb.velocity = new Vector3(0, 5f, 0); // 跳跃

// 移动(物理安全,带碰撞检测)
rb.MovePosition(targetPos);
rb.MoveRotation(targetRot);
Collider(碰撞体)
| 类型 | 形状 | 性能 | 用途 |
|---|---|---|---|
| BoxCollider | 长方体 | 最快 | 箱子、墙壁、建筑 |
| SphereCollider | 球体 | 快 | 球、角色、子弹 |
| CapsuleCollider | 胶囊体 | 快 | 角色(最常用) |
| MeshCollider | 自定义网格 | 慢 | 复杂地形 |
碰撞检测与触发器
// 碰撞体有两个模式:
// 1. isTrigger = false(默认)→ 物理碰撞(会阻挡)
// 2. isTrigger = true → 触发器(穿过,不阻挡)

// === 碰撞回调(isTrigger = false)===
void OnCollisionEnter(Collision collision)
{
    Debug.Log($"碰撞了: {collision.gameObject.name}");
    // 接触点
    ContactPoint contact = collision.contacts[0];
    Debug.Log($"碰撞点: {contact.point}");
    // 碰撞力
    float impactForce = collision.relativeVelocity.magnitude;
}

void OnCollisionStay(Collision collision) { // 持续碰撞中每帧调用 }
void OnCollisionExit(Collision collision) { // 碰撞结束 }

// === 触发器回调(isTrigger = true)===
void OnTriggerEnter(Collider other)
{
    if (other.CompareTag("Crop"))
    {
        Debug.Log($"进入作物区域: {other.name}");
        // 拾取逻辑
        Destroy(other.gameObject);
    }
}
void OnTriggerStay(Collider other) {}
void OnTriggerExit(Collider other) {}
Physics.Raycast — 射线检测
// 射线检测是 3D 游戏中最常用的操作之一
// 用途:鼠标点击检测、子弹命中、视线检测、地面检测

// 单条射线
Ray ray = new Ray(origin, direction);
if (Physics.Raycast(ray, out RaycastHit hit, maxDistance))
{
    Debug.Log($"命中: {hit.collider.name} 在 {hit.point}");
    Debug.Log($"距离: {hit.distance}");
    Debug.Log($"法线: {hit.normal}");
}

// 从屏幕鼠标位置发射射线(最常用!)
Ray mouseRay = Camera.main.ScreenPointToRay(Input.mousePosition);
if (Physics.Raycast(mouseRay, out RaycastHit mouseHit, 100f))
{
    // 点击到了某个物体
    Debug.Log($"点击了: {mouseHit.collider.gameObject.name}");
}

// 带 LayerMask 过滤(只检测特定层)
int groundLayer = 1 << LayerMask.NameToLayer("Ground");
int cropLayer = 1 << LayerMask.NameToLayer("Crop");
int combined = groundLayer | cropLayer;
if (Physics.Raycast(ray, out RaycastHit hit, 100f, combined))
{
    // 只检测 Ground 和 Crop 层
}

// 射线检测所有物体(穿透检测)
RaycastHit[] hits = Physics.RaycastAll(ray, 100f);
foreach (RaycastHit h in hits)
{
    Debug.Log($"穿过: {h.collider.name}");
}
完整示例:农场点击交互
public class FarmClickHandler : MonoBehaviour
{
    public LayerMask clickableLayers;
    public float maxRayDistance = 100f;

    void Update()
    {
        if (Input.GetMouseButtonDown(0))
        {
            Ray ray = Camera.main.ScreenPointToRay(Input.mousePosition);

            if (Physics.Raycast(ray, out RaycastHit hit, maxRayDistance, clickableLayers))
            {
                GameObject clicked = hit.collider.gameObject;

                // 尝试获取 IInteractable 组件
                if (clicked.TryGetComponent<IInteractable>(out IInteractable interactable))
                {
                    interactable.OnInteract(gameObject);
                }
                else if (clicked.CompareTag("CropPlot"))
                {
                    Debug.Log($"点击了地块: {clicked.name}");
                }
            }
        }
    }
}
2.8 资源系统:Resources / Addressables / AssetBundle
三种方案对比
| 方案 | 易用性 | 分包支持 | 热更新 | 小游戏适用 |
|---|---|---|---|---|
| Resources | ⭐⭐⭐ 最简单 | ❌ 不支持 | ❌ 不支持 | ❌ 首包太大 |
| Addressables | ⭐⭐ 中等 | ✅ 原生支持 | ✅ 远程目录 | ✅ 强烈推荐 |
| AssetBundle | ⭐ 手动管理 | ✅ 手动实现 | ✅ 手动实现 | ⚠️ 可用但复杂 |
发布抖音小游戏时,首包体积限制非常严格(通常 4~10MB)。Resources 文件夹中的所有内容都会打进首包且无法拆分。必须用 Addressables 或 AssetBundle 做资源分包和按需加载。
Addressables 完整使用教程
安装
- Window → Package Manager
- 搜索 "Addressables",Install
- Window → Asset Management → Addressables → Groups
- 首次使用时点击 "Create Addressables Settings"
配置资源分组
- 在 Addressables Groups 窗口中,右键 → Create → Addressables Group 创建新组
- 把资源从 Project 窗口拖拽到对应 Group 中
- 每个 Group 可以设置不同的加载方式(Local / Remote)
- 给资源打 Label(标签),用于批量加载
完整加载代码
using UnityEngine;
using UnityEngine.AddressableAssets;
using UnityEngine.ResourceManagement.AsyncOperations;
using System.Collections.Generic;

public class AddressableLoader : MonoBehaviour
{
    // ---- 方式1:通过 Address(路径字符串)加载 ----
    public void LoadByAddress()
    {
        Addressables.LoadAssetAsync<GameObject>("Assets/Prefabs/Crop.prefab")
            .Completed += handle =>
        {
            if (handle.Status == AsyncOperationStatus.Succeeded)
            {
                GameObject prefab = handle.Result;
                Instantiate(prefab);
            }
        };
    }

    // ---- 方式2:通过 Label 加载 ----
    public void LoadByLabel()
    {
        Addressables.LoadAssetsAsync<GameObject>(
            "crops",           // label
            prefab => {
                // 每加载一个就回调
                Instantiate(prefab);
            }
        );
    }

    // ---- 方式3:加载场景 ----
    public void LoadScene()
    {
        Addressables.LoadSceneAsync("Assets/Scenes/Farm.unity").Completed += handle =>
        {
            Debug.Log("场景加载完成");
        };
    }

    // ---- 方式4:释放资源(重要!防止内存泄漏)----
    private GameObject _loadedPrefab;

    public void LoadAndRelease()
    {
        Addressables.LoadAssetAsync<GameObject>("Crop").Completed += handle =>
        {
            _loadedPrefab = handle.Result;
            Instantiate(_loadedPrefab);
        };
    }

    public void ReleaseAsset()
    {
        // 释放句柄(下次加载会重新从磁盘读取)
        Addressables.Release(_loadedPrefab);
    }

    // ---- 方式5:实例化并自动管理 ----
    public void InstantiateManaged()
    {
        // Addressables.InstantiateAsync 会追踪实例
        // 销毁实例时自动释放资源引用
        Addressables.InstantiateAsync("Crop", transform.position, Quaternion.identity);
    }
}
Addressables Build 设置
- Window → Asset Management → Addressables → Profiles
- 设置 Remote 和 Local 的加载路径
- Groups 窗口 → Build → New Build → Default Build Script
- 产物在
Library/com.unity.addressables/下
抖音小游戏的资源分包方案正是基于 Addressables 或 AssetBundle。模块 4 会详细讲解如何将 Addressables 的远程包部署到 CDN,以及如何在小游戏环境中正确加载。
你已经掌握了 3D 开发的核心知识。接下来进入 模块 3:读懂并二开他人 Unity 工程,学习如何快速理解客户的农场游戏工程。